Tillamook Creamery responds to questions about GMOs

I have become ever-mindful about the foods I am eating, and increasingly more so in recent months.

When I learned that Land O’ Lakes butter was made with GMO-grain fed cow’s milk, I decided to pose the question to our own Oregon Coast neighbor, the Tillamook Creamery.

Tillamook Creamery

Tillamook Creamery

Here is how that exchange went.

My email to them:

message: I recently became aware that Land O’Lakes uses GMO materials in the manufacture of their butter. I am assuming this is related to the diet of their herd, but who can say?
My question is, does Tillamook use GMO- affected products in the manufacture of your butter, milk, ice cream, cheese, yogurt, etc.
A lot of us who buy these products have chosen Tillamook because of the proximity of Tillamook, to where we live (also on the Oregon Coast. It allows us to fancy ourselves loca-vores (despite so many of the products being made elsewhere, in reality).
But all of us are careful to try to avoid GMO products and processes which use a GMO-affected product. We need some straight answers about how Tillamook utilizes GMO affected products and grains.


… after a week or so, this was their response:

Hi Rachel,

Thank you for reaching out to us directly. We know the GMO topic is a sensitive and important one to some consumers, and we want to be as accurate as possible in responding to questions and concerns about it.  First and foremost, the core ingredients in all our products are milk and cream of the highest quality produced in the most natural way possible, and neither of these ingredients have exposure to GMOs.  In regards to some of the additive ingredients – particularly to our ice cream and yogurt – the answers are a bit more complex.  At this time, and in the absence of any clear standards or definitions around genetically modified substances, it is hard to categorize which ingredients are – with certainty – GMO-free.  We do use some ingredients like natural flavoring (e.g. sugar or corn syrup for sweetening), natural coloring (e.g. beet juice), and stabilizers (e.g. corn starch and soy lecithin) that have the possibility of being derived from GMO sources because of the pervasiveness of GMOs in agricultural crops in the United States.

Our farmers know that healthy cows make the best quality milk and part of this is a healthy diet.  The farmer-owners and all the dairymen who supply milk for Tillamook dairy products use a variety of forages and grains for feed. While the mixture varies dairy to dairy, it’s likely to include a mix of grass, alfalfa, some corn silage, and grains such as barley or soy. All of this is balanced by a nutritionist who also adds a vitamin/mineral supplement to ensure the healthiest cows possible, and thus the highest quality milk.  The feed used by our farmers and suppliers is both home grown on our farmer’s fields and purchased.

At this time, and in the absence of any clear standards or definitions around genetically modified substances, it is hard to know if the feed purchased for every cow contributing to our milk supply is GMO-free. In today’s market, it is extremely difficult to source feed for cattle that is 100 percent verified as GMO-free, given how pervasive GMOs are in the grain supply chain.  Even organic feed for organic farms is extremely difficult to verify as GMO-free because of cross-pollination. 

I hope this information is helpful. Please let me know if you have any more questions.

Thanks,

Callie O’Sullivan
Consumer Loyalty Team
Toll-free: 1-855-Loaf-Love (562-3568)
Tillamook.com | Tillamook Twitter | Tillamook Facebook

________________________________________________________________
My hat’s off to Tillamook for responding to my inquiry in an intelligent and sensitive manner.

I appreciate them not treating my question as trivial and also for giving me the most thorough explanation possible, under the circumstances.

I really wanted the answer to be a very simple and straight-forward “No”. But that isn’t the world we live in.

I will continue to use their butter and cheese (even though they refuse to remove corn syrup from their ice cream 😦 )

Just thought others might want to know how this company responded to a direct question about GMO-affected products.
2 Months of Handcrafting…

Making America Awesome, again, through self-sufficiency!

Since I began my journey down the Handcrafted Road, I have learned so much, tried so many new things, and gained confidence from both epic successes and epic failures.

When I started this journey, I already made all my own bread and brownies. Since then, I have added quite a few things and began handcrafting them, rather than buying them. The list is pretty impressive, if I say so myself.

I have tried:

the reveal

the reveal

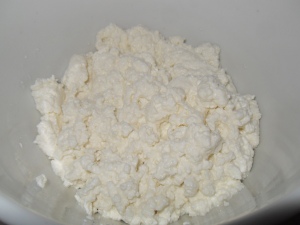
cottage cheese curd

cottage cheese curd

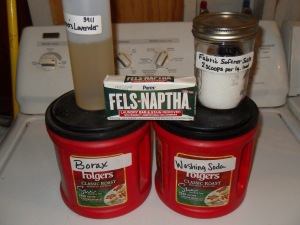
laundry ingredients

laundry ingredients

I like all of these products very well, and will probably make them again.

Here is a list of products I have mastered, love and use every day. I will never have to buy these items again:

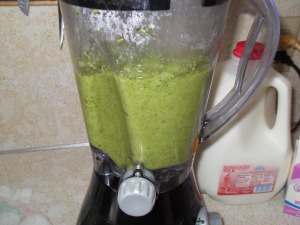
green onions after over a week

green onions after over a week

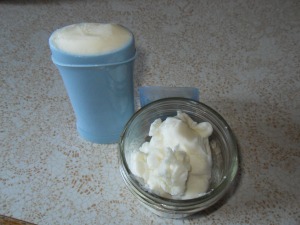
ready to use, or store

ready to use, or store

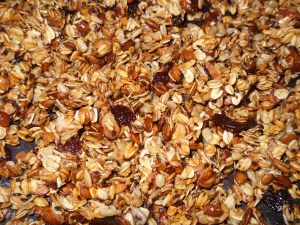
cherry cashew vanilla granola

cherry cashew vanilla granola

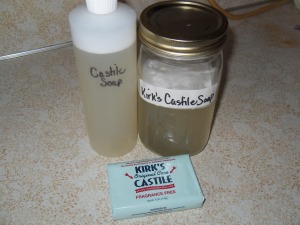
boom. quart of liquid coconut-castile soap for $1.89

boom. quart of liquid coconut-castile soap for $1.89

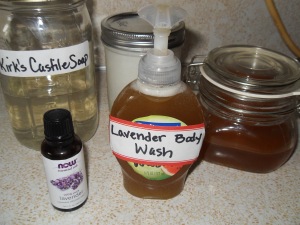
Boom!  Body Wash.

Boom!
Body Wash.

soup!

soup!

I am also using a marvelous toothpaste made of coconut oil and baking soda. But I haven’t done a blog post about that yet!

My dream of providing healthy, effective alternatives to store-bought, chemical-laden products is coming along at lighting pace. Yes, it takes longer. Yes it is more work. Yes, it would be easier to buy them. But it is also cheaper, safe and gives me a chance to stick it to the Corporate Machine a bunch of times, every day.

All toll, I think it has been a successful 2 months! I can’t wait to see what I handcraft next!

Learning From My Failures

I have attempted to make cheese 5 times. 3 times, it resulted in cheese (or presumed cheese, as 2 are still aging). Twice it ended in complete and utter failure.

In my continuing quest to use a scientific and analytic mind to examine failure and find my mistakes, I have discovered that both times I blew it, the cause was morning.

I have never been a morning person, but sometimes, when working an experiment, the next step needs to take place first thing in the morning. So, I have embraced this reality. The trouble is, my scientific brain doesn’t wake up until much later than my auto-pilot.

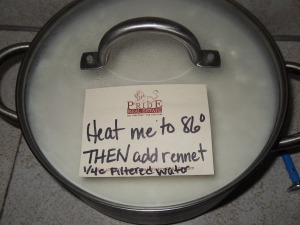
As I have been able to isolate the step I keep leaving out because I am brain-challenged at this time of day, I have found a very low-tech solution to my problem. Post It notes:

success comes with a reminder

success comes with a reminder

This way, it doesn’t matter that I am not fully awake. I know what to do next.

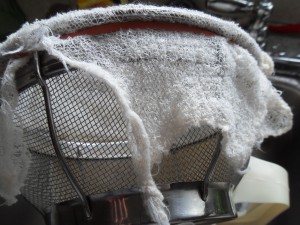
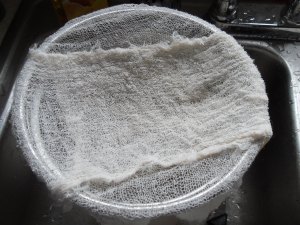
Another difficulty I have been having is keeping my cheesecloth in my strainer when I drain the whey from the curd. My Aha! moment happened when I realized a rubber band would keep the edges of my cloth in place as I drained. Another absolutely low-tech solution to my ghetto equipment problem. Here are both views:

rubber band holding the cheesecloth in place

rubber band holding the cheesecloth in place

a stable surface to drain the curd into

a stable surface to drain the curd into

As I celebrate my successes and learn from my mistakes, I find I am more excited than ever to be streamlining my process, increasing my success and building confidence to try new types of cheeses.


A “Gateway Cheese”

After tasting my first little cheese, I am hooked on cheesemaking!

Ian Treuer, of Much To Do About Cheese coined the phrase (in my vocab, anyway) and nothing could be more true. One bite of that delicious, handcrafted cheese, and I knew it was gonna be on like Donkey Kong.

I am already dreaming about variations, flavors, colors, rinds… I want to buy molds and make a press. I am beyond obsessed about making new and amazing cheeses. Plus, I really liked the original, which I have finally figured out how to make, reliably.

That little gateway cheese won my heart after only 5 short weeks in the making. And I know that additional ripening time would make for an even more pleasing product (we like ’em a little sharp at my house).

Tonight I inoculate another gallon of milk with my own handcrafted yogurt, and begin another odyssey into the glorious and ancient and magical world of making my own cheese. The round I press tomorrow won’t be ready until almost MayDay, but it will make for a delicious addition to the Beltane festivities.

Excited, confident, inspired, I go forth, past the Gateway and into the realm of Cheese, made by hand. This is how I stick it to Monsanto, this week.

Go forth and be Awesome, America (and elsewhere)!


Little Cheese #1 Reveal!

When we last saw Little Cheese #1 on March 7, she looked like this:

Little Cheese #1

Little Cheese #1

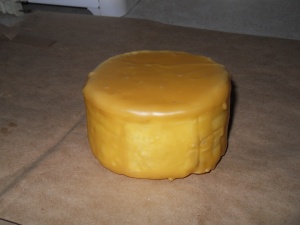
coated in beeswax and aging in my fridge. The recipe called for an aging time of one month. I almost made it. Today is 2 days shy of that mark, but, honestly, I waited as long as I could stand to.

This cheese was made with my own homemade yogurt as an inoculant.  The details about how I made this batch are outlined in this post from March 3.

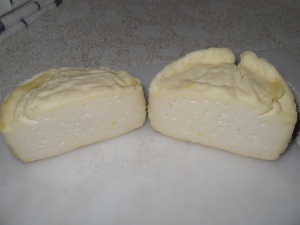
This morning, I took her from the fridge and cut her in half, so I could begin to survey the texture of the finished cheese.

the reveal

the reveal

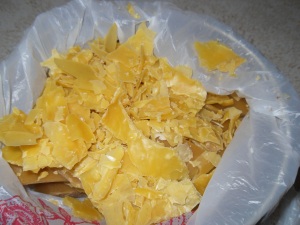
I peeled and saved all the beeswax from the round. Beeswax is expensive and I want to be able to reuse as much as possible.

saved beeswax

saved beeswax

wax removed

wax removed

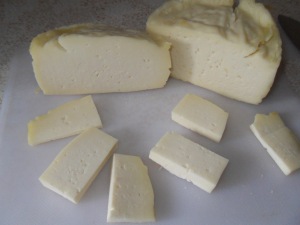
Then I cut a slice and nibbled it slowly, and shared a piece with my husband, another  true cheese-a-holic. As I want to reduce our dependence on Tillamook cheddar, it was vital to get his opinion as well.

The texture was familiar, like a cheddar or a colby. Firm, but yielding. The flavor was very mild, and almost mild cheddar-like. I would use more salt next time, as it was a teeny bit bland, but otherwise delicious!

My online cheesemaking mentor, Ian Treuer, of Much To Do About Cheese (an actual cheesemaker!) says that “if it’s edible, it’s a success”, so Ian, it was a success! Not only was it edible, but it was lovely!

I believe that another 2 weeks aging would have made a lot of difference in the sharpness and would have made it more flavorful. Maybe even another month. But on my first go, that is insanity! I could never have waited that long!

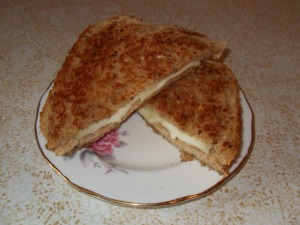
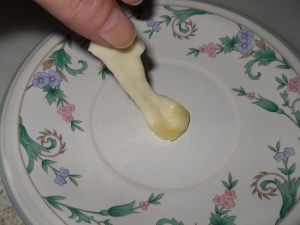
Another vital test to me was melt-ability. I need to know that in a zombie apocalypse I can have a grilled cheese sandwich.

melting

melting

It melted quickly and had a consistency that seemed a cross between melted mozzerella and melted swiss. A little rubbery, but also sort of creamy. Absolutely perfect for a grilled cheese. And, let’s face it, if zombies are descending, comfort food is at a premium.

I am 100% thrilled, overall, with the outcome of this experiment. I will add more salt at the mix of the curds,before molding and pressing, and I will age the next batch (after Little Cheese #2- I want to taste the difference between the yogurt inoculant and the buttermilk- I am dying to compare, in fact. That batch won’t be finished aging until the 16th. I am going to stash a few slices of #1 to compare when #2 is revealed) a couple of weeks longer, to see if there is additional sharpness due to longer aging.

But for now, I am going to enjoy a few slices with my lunch, and rejoice that the Cheese Gods have smiled upon this venture.

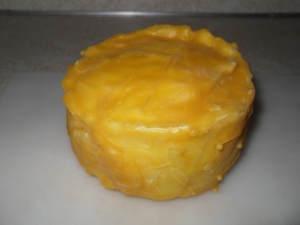
gorgeous, delicious finished hard cheese

gorgeous, delicious finished hard cheese

Now, I am dying to make more!!!!

Thank you Ian, at Much Ado About Cheese for your encouragement. I have been, decidedly, bitten by the Cheesemaking bug and will be trying some new things as soon as possible!!!


Remember our friend Little Cheese #2?

Cheese #2

Cheese #2

Sure you do! She looked just like this, about 5 days ago.

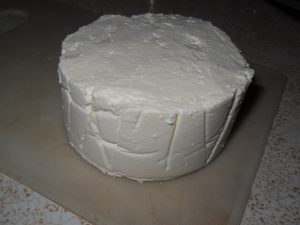
Well, today was her waxing day, and she turned out very nice.

Little Cheese #2 on waxing day

Little Cheese #2 on waxing day

I still find that the prescribed directions for curing leave the cheese out too long. Again, deep cracks formed in the wrinkles from the cloth in my ghetto tin can mold, and anywhere I had to shave it to make smooth edges. This tells me two things. 1. A smooth molded and pressed edge is essential, and for me to ever be happy with the look of them, I am going to have to acquire some proper molds. 2. It tells me that I need to not wait for the “yellowish gold crust” to form, but to perhaps leave it to cure until it stops seeping damp, or maybe one day longer. No more.

The most crucial thing to me, aside from edibility, is to learn from each attempt. To see what works and what doesn’t. Since I am essentially teaching myself to make cheese as I go, this seems to me to be the best way to learn.

In order to gain proficiency in cheesemaking, one must be willing to spend a lot of time, develop the patience of Job and release any guilt or chafing at the idea of “wasting” milk. I have tried 4 times, using 4 gallons of milk, and have 2 little cheese prototypes to show for it.

Still, seeing those little golden circles aging in my fridge gives me a deep sense of satisfaction. It connects me to my Irish ancestors, whose cheeses are of the Cheese of Legends.  It gives me a sense of pride in a job (well done or not) and shows me that my dependence on Tillamoook medium cheddar could potentially wane over time, which is my primary goal.

Voila! I present, Little Cheese #2. *Note, I have dated this cheese because it is necessary, anytime I have more than one thing to remember, for example, the unveiling dates of more than one round of cheese. I didn’t need to date Little Cheese #1 because it’s Finish Date is engraved, indelibly, on my very soul…the countdown to fresh cheese continues…22 days and counting…

ready for aging...

ready for aging…

The Tail End of the Jam…

or, another year of Hand crafting begins anew!

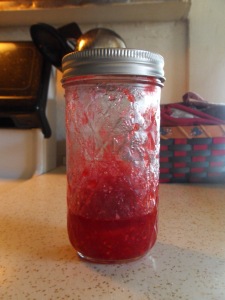
last of Mel's raspberry freezer jam

last of Mel’s raspberry freezer jam

As the stores of the previous year come to their end, it is time to begin looking ahead to the new year of Handcrafting! I am taking this time, before the first seed is planted to outline my goals for this year’s Creations.

  • greenhouse and raised bed gardening, growing 90% of our fresh fruits and veg, including various forms of tomatoes, onions, broccoli, peas, summer squash, salad crops and spinach
  • canning, pickling, drying and preserving our own grown food as well as produce from local farms and orchards, including stewed tomatoes, spaghetti sauce, tomato sauce, dill sandwich pickles, saurkraut, dried cherries and plums, canned peaches and various jams and jellies
  • starting a new flock of laying chickens
  • obtaining a local source of beeswax and honey
  • obtaining a local source of milk for my dairy projects
  • eliminating reliance on any boxed food in 2014
  • replacing all store-bought laundry products with natural alternatives, as well as replacing all household cleaners, except bleach. (I will cling to my bleach well beyond the Zombie Apocalypse)
  • To become proficient in cheesemaking and reduce our reliance on Tillamook medium cheddar.
  • And, of course, to Stick-It-To-Monsanto and BigFood, wherever possible, spreading the Word of Real Food on any budget.

My ambitions are great this year. And I have a plan for each aspect of improvement. It is such an exciting time, as the Earth awakens from her Winter slumber. I intend to take full advantage of the abundant energy of Renewal in the air to motivate and connect me to my purpose of returning to Nature for my food and products.

What will you be handcrafting this year???


Good Morning, Beautiful!

As promised, a picture of the “started” cheese, out of the press:

Cheese #2

Cheese #2

It is a queer sensation, to be so pleased with firmly pressed curds of milk. But after a couple of completely boneheaded fails, I am willing to call it perfection!

She has been liberally dusted in salt, wrapped in muslin and is curing in the fridge, with her wax-covered, aging predecessor from a week or so ago.

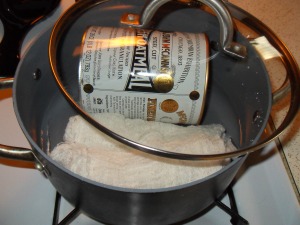
As with all “mad scientists”, I am already looking for ways to improve my process. A better press (than a crock and a spaghetti sauce can) would be nice. I am always looking for really heavy things that measure less than 5 inches in diameter to use as a weight. Maybe a mold that is a little less Irish ghetto than an oatmeal can. Proper presses and molds aren’t cheap, but I am not going to let a lack of equipment slow me down! But, a girl can dream…

Someday, I would like to invest in some real bacterial strains and make a more reliable cheese. I am already not as happy with the tangy-ness of the buttermilk incoulant. The yogurt was milder, and I will be using that, instead of the buttermilk, in the future. The flavors of the cheeses will be very different as a result of the different incoulants.

The point is, as always, start where you are, use what you have and do what you can. And, this morning, I am happy with the cheese I could make with what I had.

This weekend, when I make Cheese #3, I will be photographing the entire process so it is easy to understand for anyone who hasn’t tried this before. Hopefully, what I have learned in all 4 attempts will aid me in making an even better product.

Next time we see Cheese #2, it will be after the cure and time to wax!

Happy Handcrafting, Everyone!!!

If at first you don’t succeed…

keep trying to make cheese!

sterilizing cheesemaking equipment

sterilizing cheesemaking equipment

Last night, I determined I would try, try again after my two failed batches over the weekend. As with all my attempts, the first step is sterilizing all the stuff needed to process the milk.

I brought the milk to 68 degrees and inoculated it with buttermilk this time. I still don’t have a successful batch made with buttermilk, and I am hoping to compare it to the kind I made with yogurt, over a week ago. Then, with lid on, it rests overnight,

This morning, I was supposed to bring the milk to 86 degrees and then add the rennet. But I forgot to heat the milk, and added the rennet at room temperature. About an hour and a half later, I realized I had made this mistake, again. My first failed batch was as a result of having forgotten this step. So, since I didn’t have another gallon of milk and entire night to wait, I put the pot on the stove and brought it up to 86 degrees. I could tell the second it reached temperature, because curd began to form, immediately.

I removed it from the heat, lidded it and waited a couple of hours. Shazzam! Clean break curd!

It was a completely Eureka moment. The first failed batch was as a result of not heating it at all. The second failed batch must have failed, not because I forgot to heat it, but because the milk wasn’t quite hot enough to kick off the reaction in the rennet! I have found my own kryptonite in the cheesemaking process! I just need to heat it a little higher than 86, so it can afford to cool a minute as I incorporate the dissolved rennet.

This time, the curd was firm and lovely, and is in the mold right now.

I am so excited to have figured out what was holding me back, and to know how to compensate for it in the future. (Like a post-it note that says “Heat me to 86+ degrees” on the lid of the pot of inoculated milk)

Tomorrow, the round comes out of the mold and will be salted for curing. I’ll be updating the blog with a picture of the “started” little Cheese #2!!!